
Sheng Xu
Works > Palette Texturing
Optimisation Technique
Page is work in progress
I developed this technique in 2014 in response to tight memory constraints on mobile devices and Unity Web Player. At the time, the project I was working on was regularly hitting memory limits, and profiling revealed that textures were consuming a disproportionate share of our available budget. I found that the project was primarily memory bound, while triangle counts were well within acceptable limits.
I had to constantly down-res our textures every time we shipped new features, and it got to a point where models just looked so muddy and unappealing.
To combat this, I played around with using more geometry to build shapes, silhouettes and details instead of using texture maps. The UVs of these shapes are squished infinitely small and then mapped to single pixels in a texture map, treating them more like a lookup table. For gradients, the UVs would be scaled to 0 in one axis only.
Using this technique, we can get fairly convincing results on flat shaded assets with extremely tiny textures.
I used a palette consisting of individual pixels as colors and small gradient ramps as the only source of texture information.
A 64x64 palette can hold:
- 512 colors
- 64 gradient ramps
Assuming an individual color occupies 2x2 pixels.
Assuming a gradient ramp occupies 2x16 pixels.
For my small gradient ramps to look smooth, these palette textures needed to use bilinear filtering. The caveat of this is that texels would blend with neighbouring texels, causing colours that occupy 1x1 pixels in the texture map to produce unexpected colours. The UVs needed to be perfectly centered on a texel in order to not receive any influence from neighbouring texels.
To combat this, colours had to be at least 2x2 pixels to avoid color blending artifacts due to bilinear filtering.
In practice, we had frequently made colors occupy 3x3 or 4x4 pixels, purely to make it faster and more forgiving to position UVs when authoring assets.
We also used radial gradients to fake lighting. These could occupy 12x12 to 18x18 pixels depending on the detail needed. Bilinear filtering would generally smooth out the colors enough for the size of the gradient to not matter too much.
Before I reveal the results of this technique, I want to show the texture maps first.
Here are the palettes I used to color an entire environment. There are 2, each 128x128 in size:
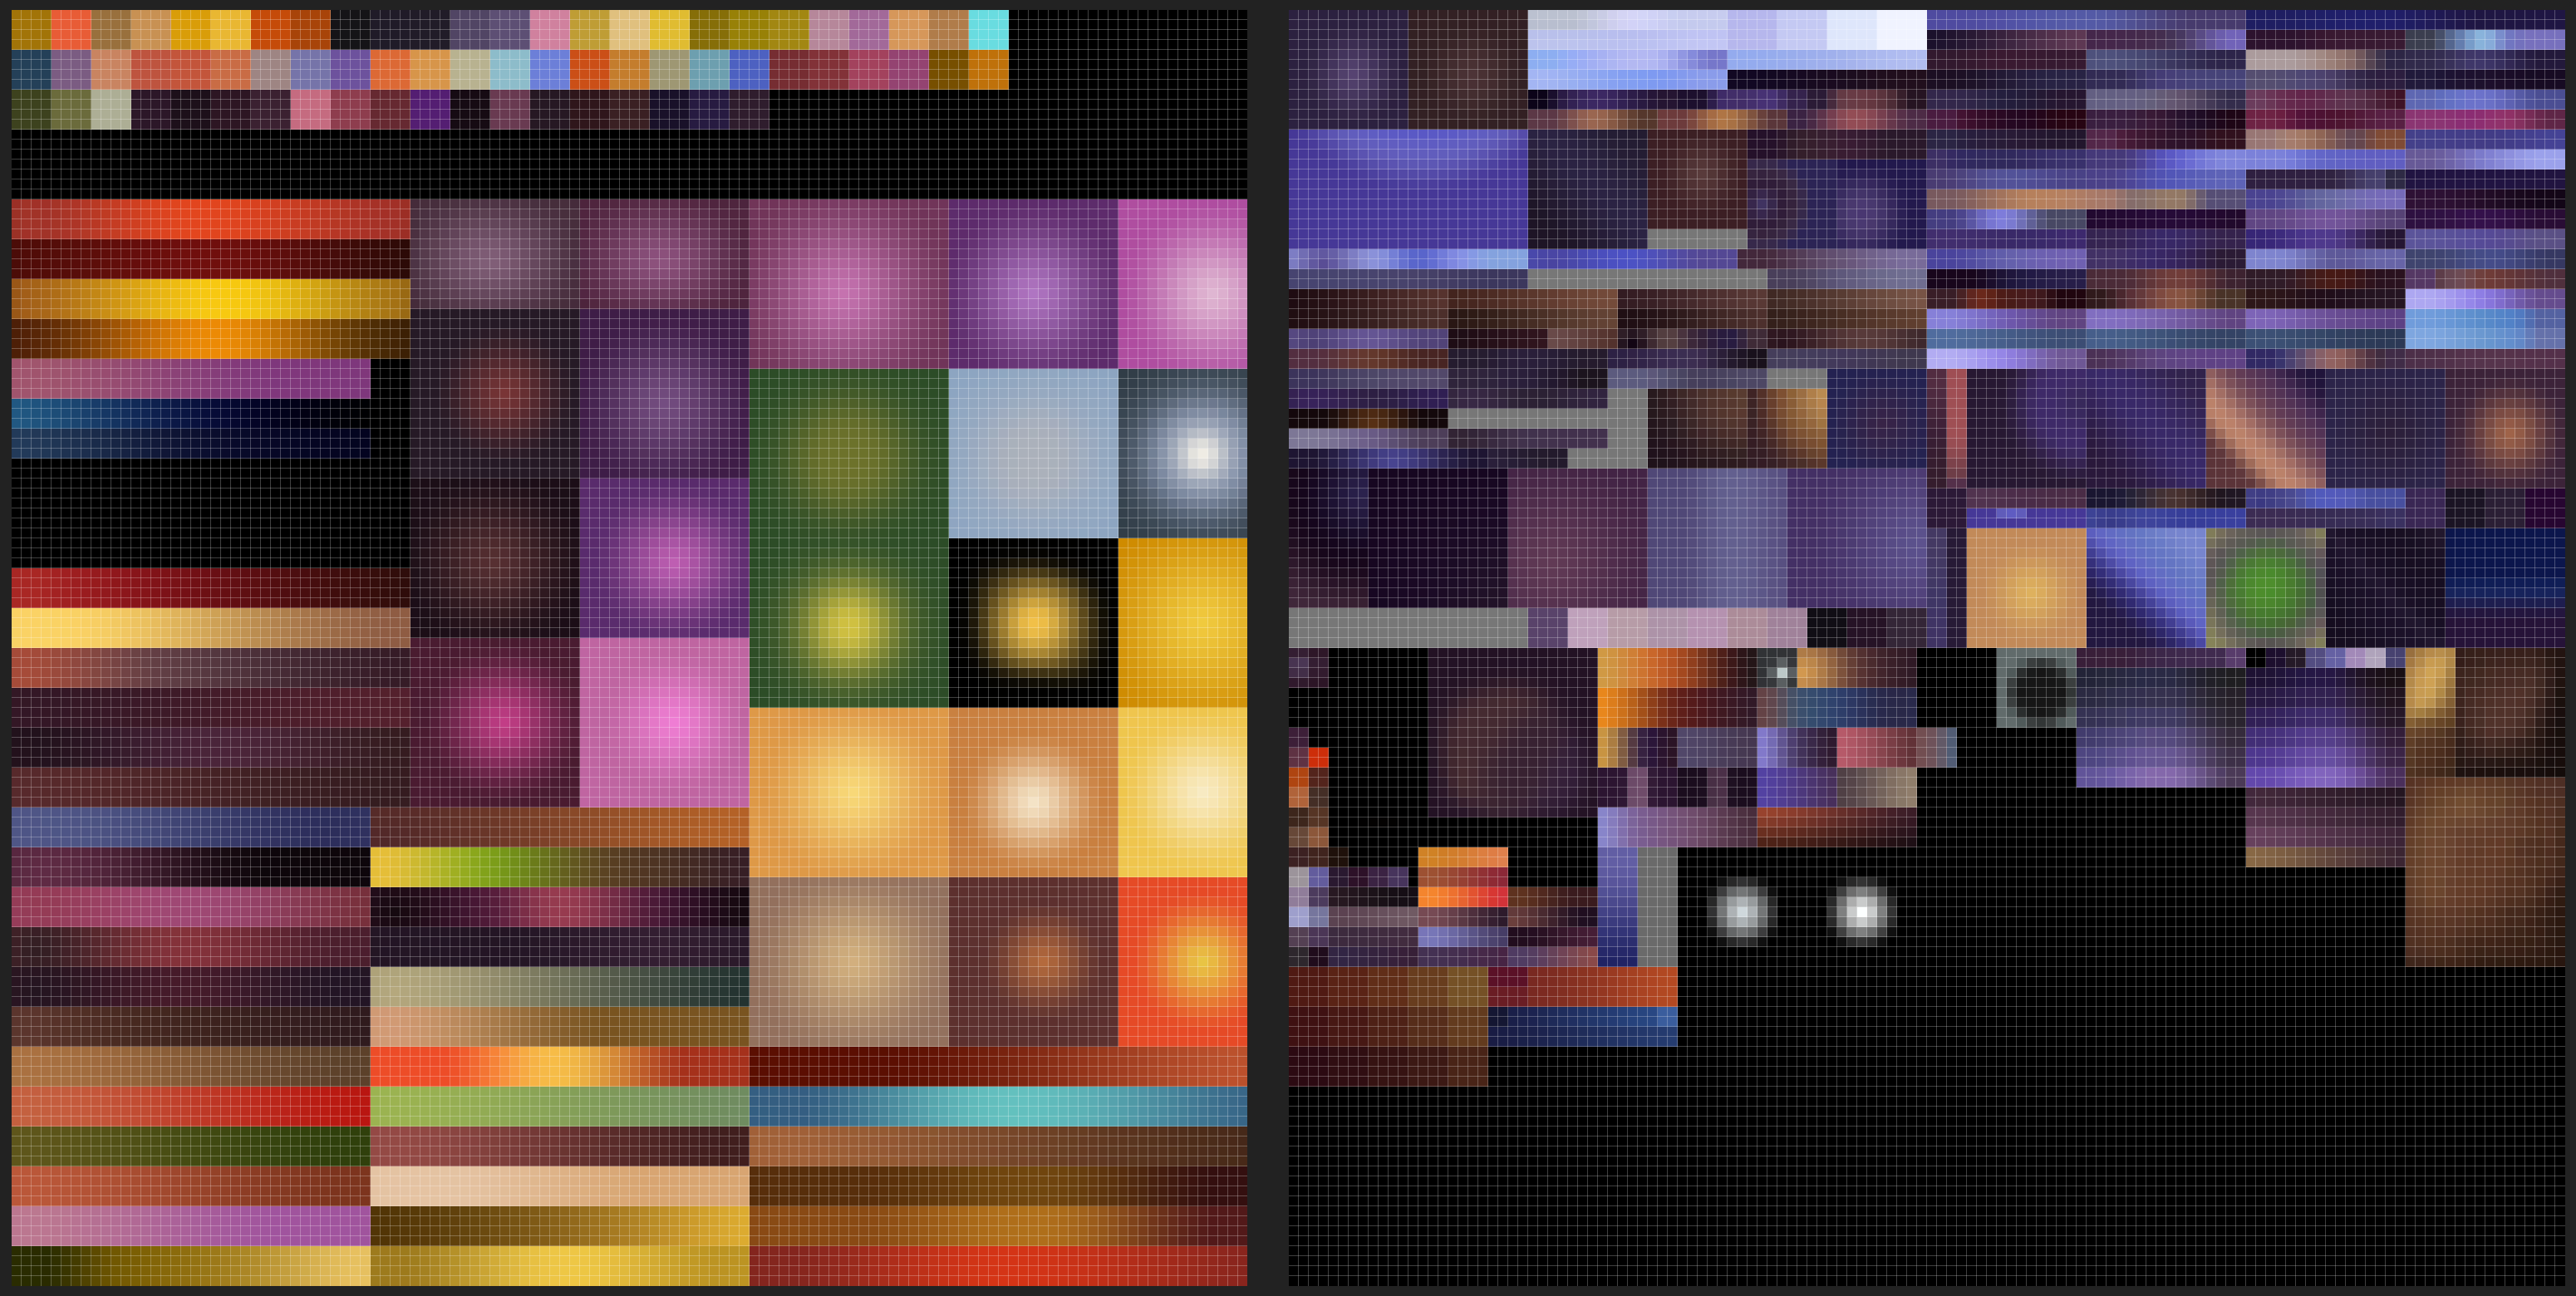
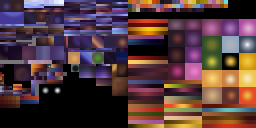
And here are the textures shown in their actual size:
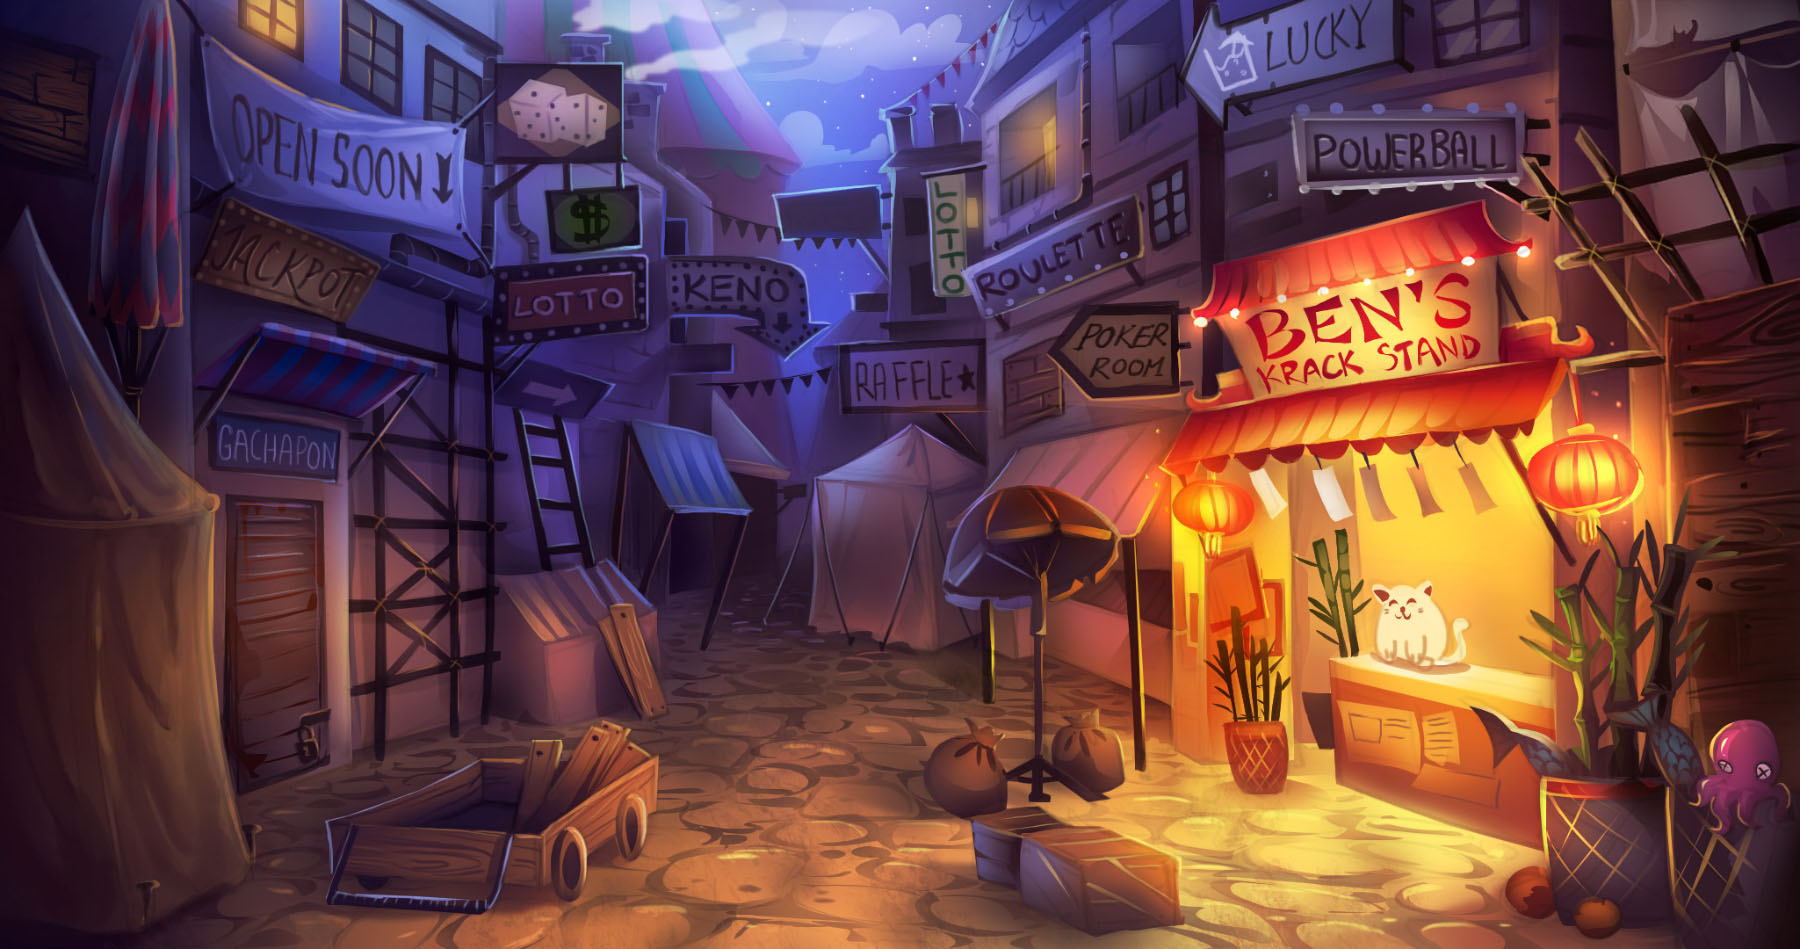
Here’s the Concept Art for the environment:
And drumroll… the full textured environment, shown in Maya with no realtime effects or lighting:
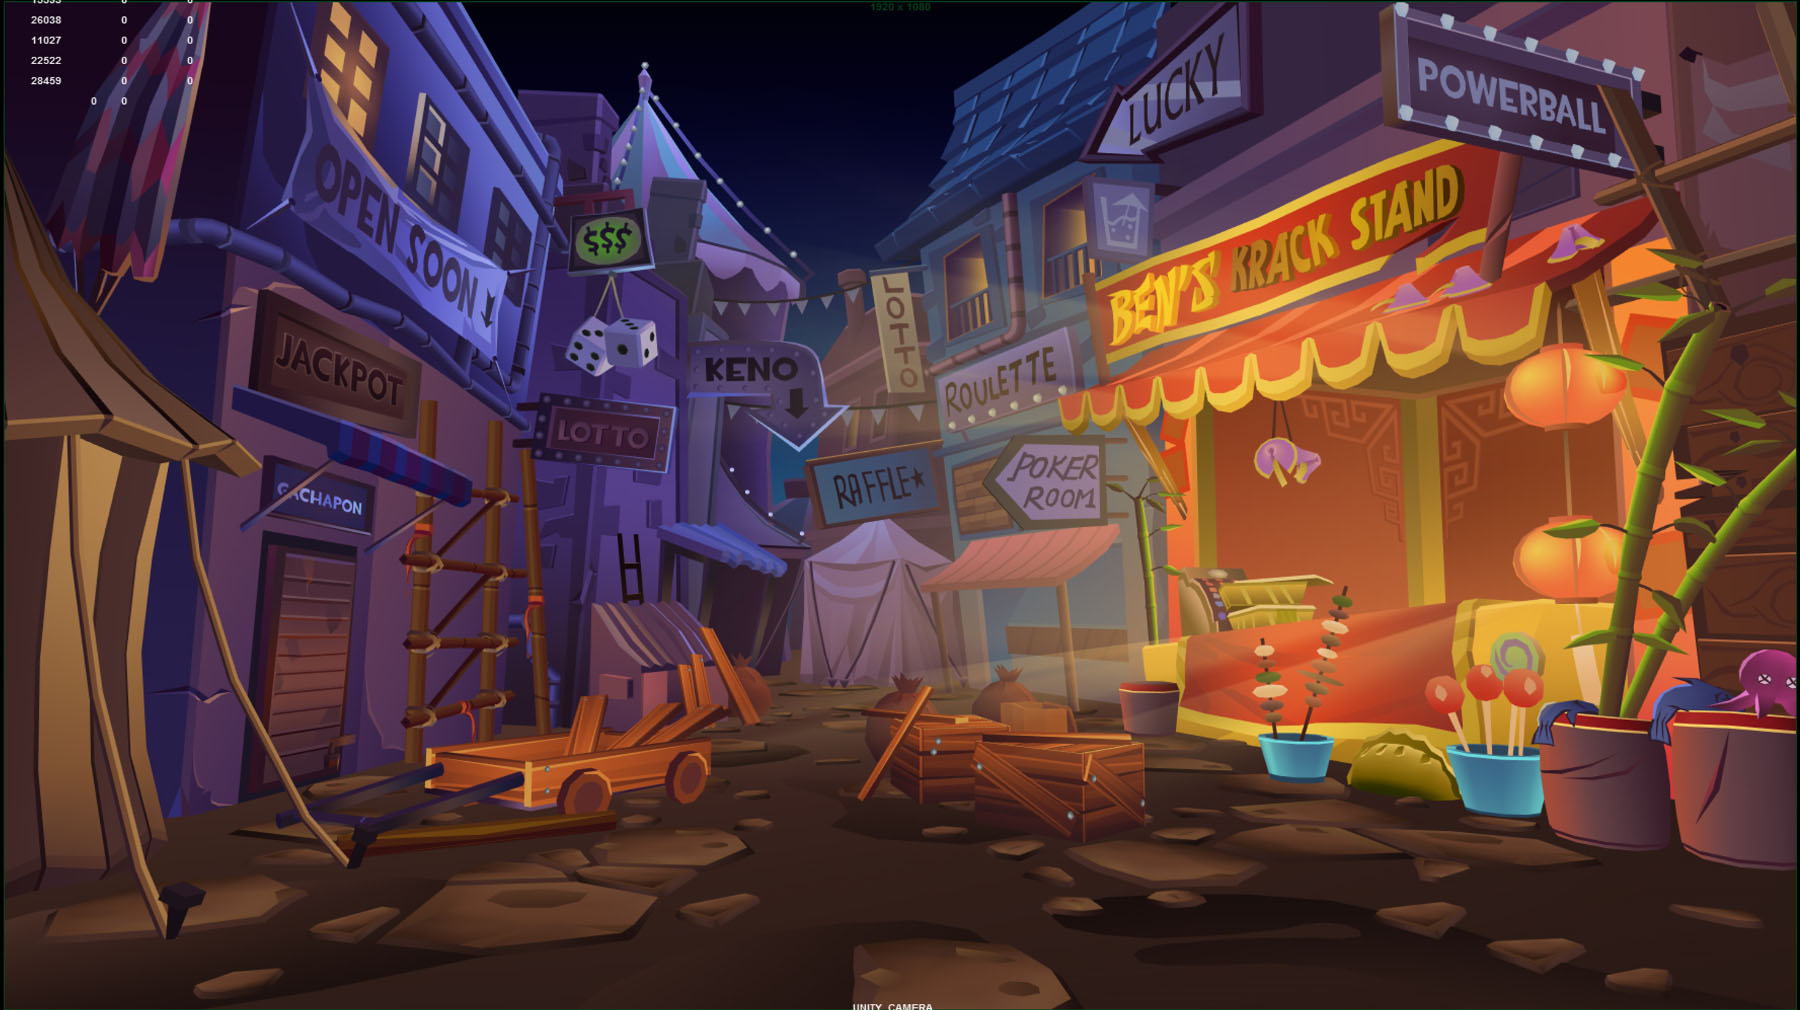
And here’s the final product running in Unity:
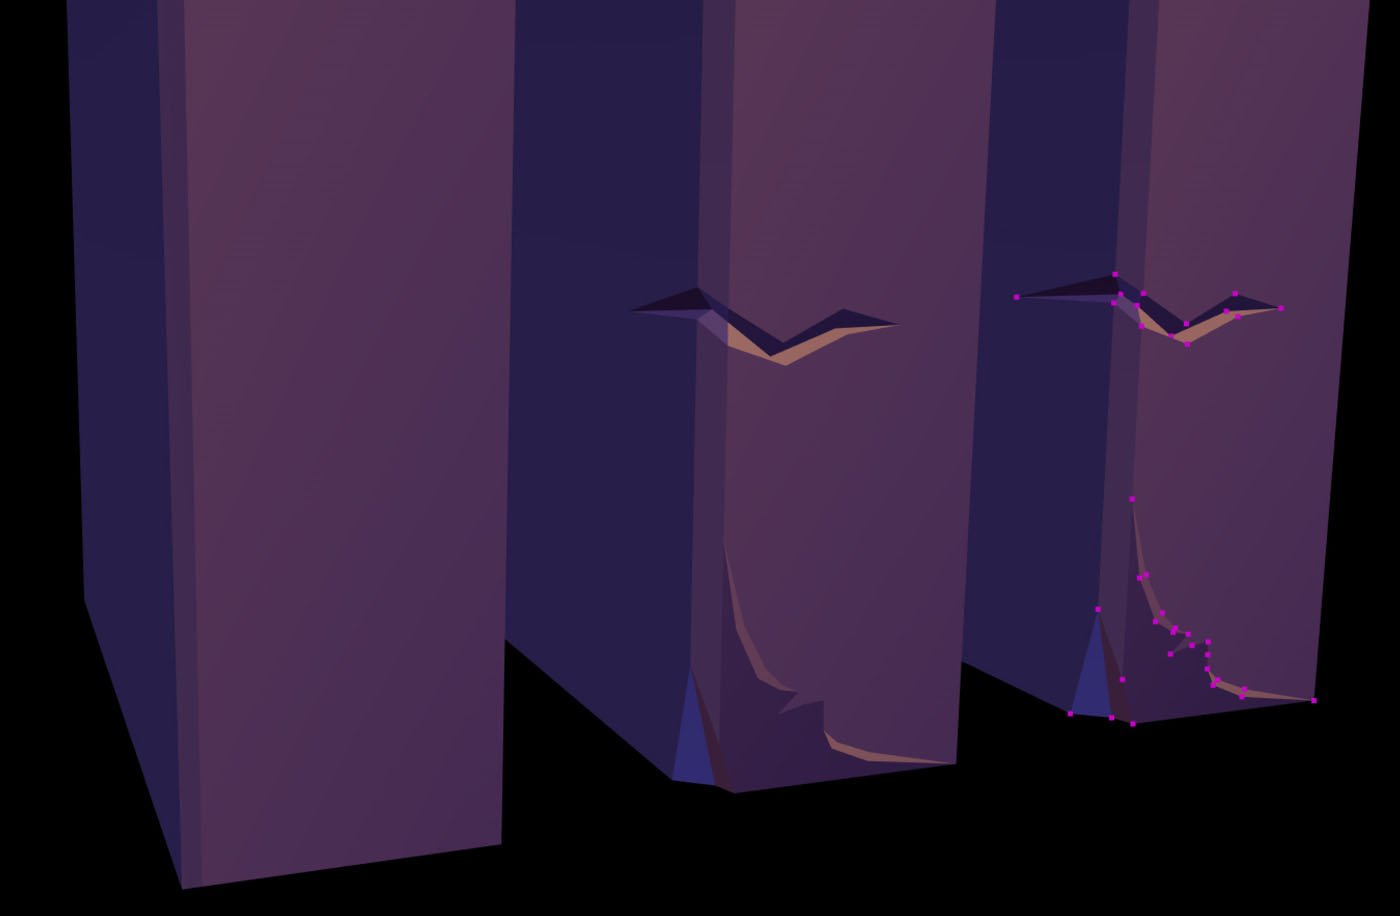
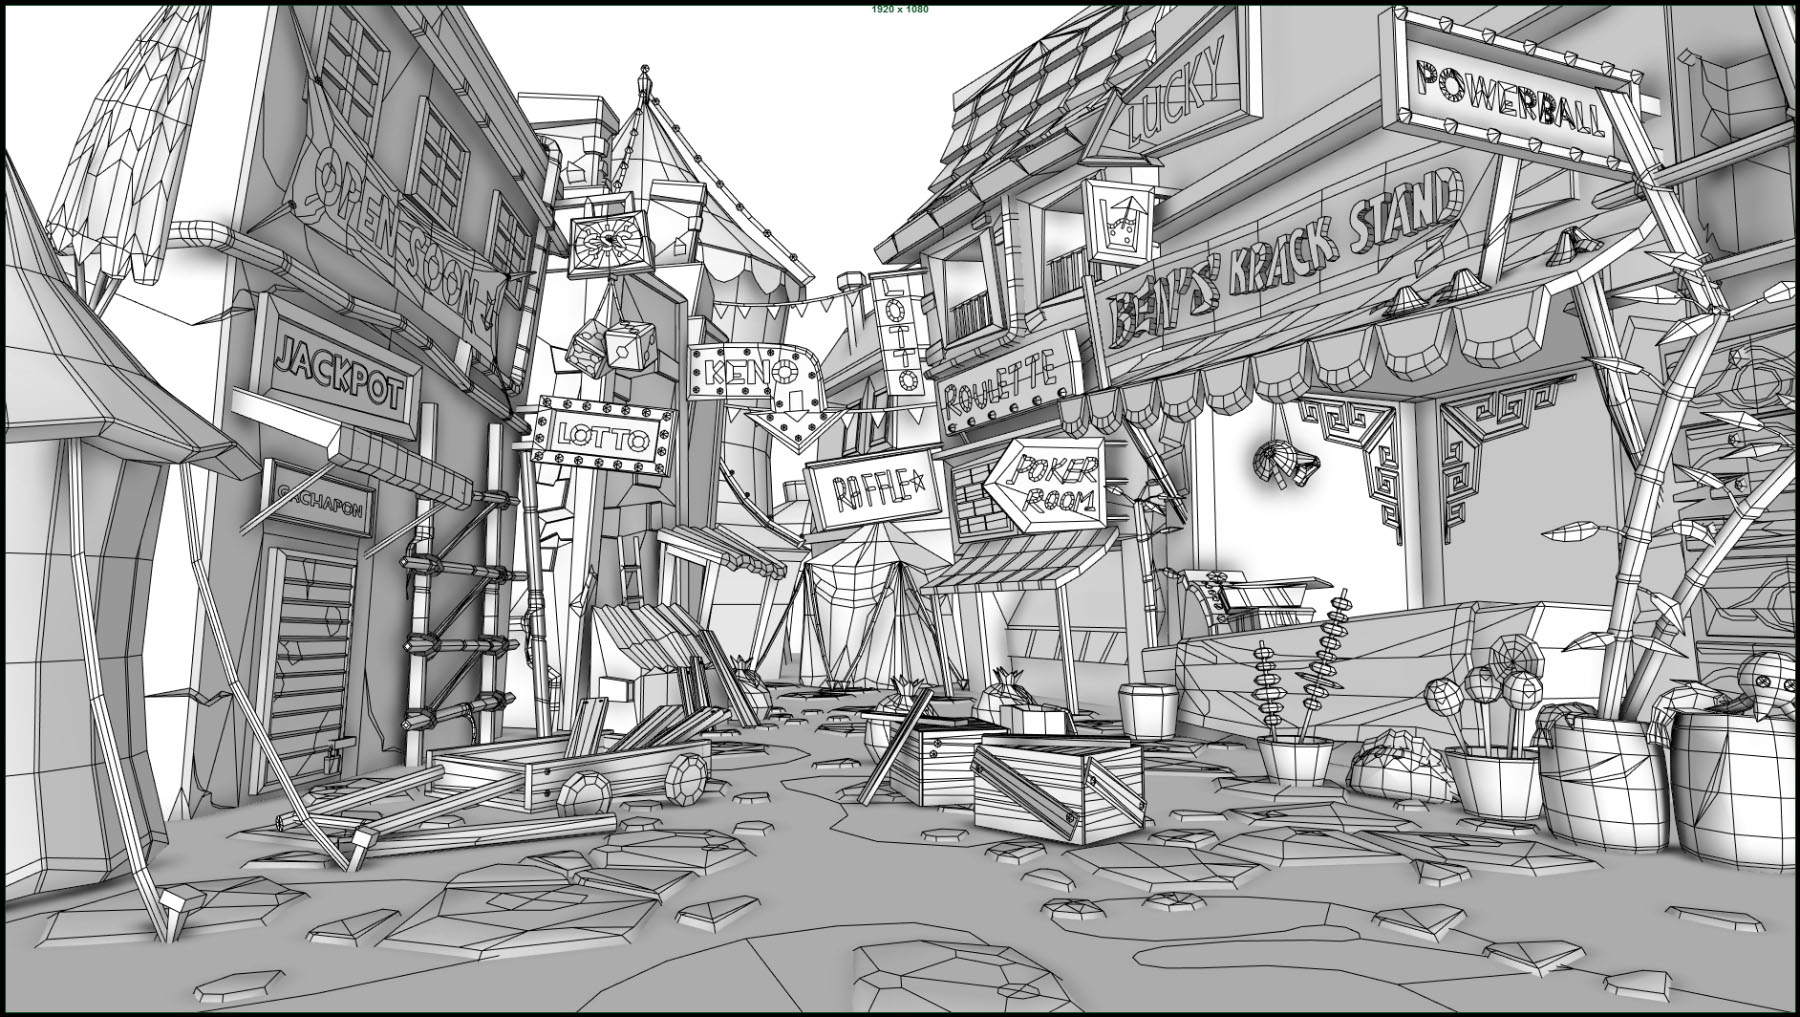
Wireframes to give an idea of how the scene was constructed with this palette texturing technique:
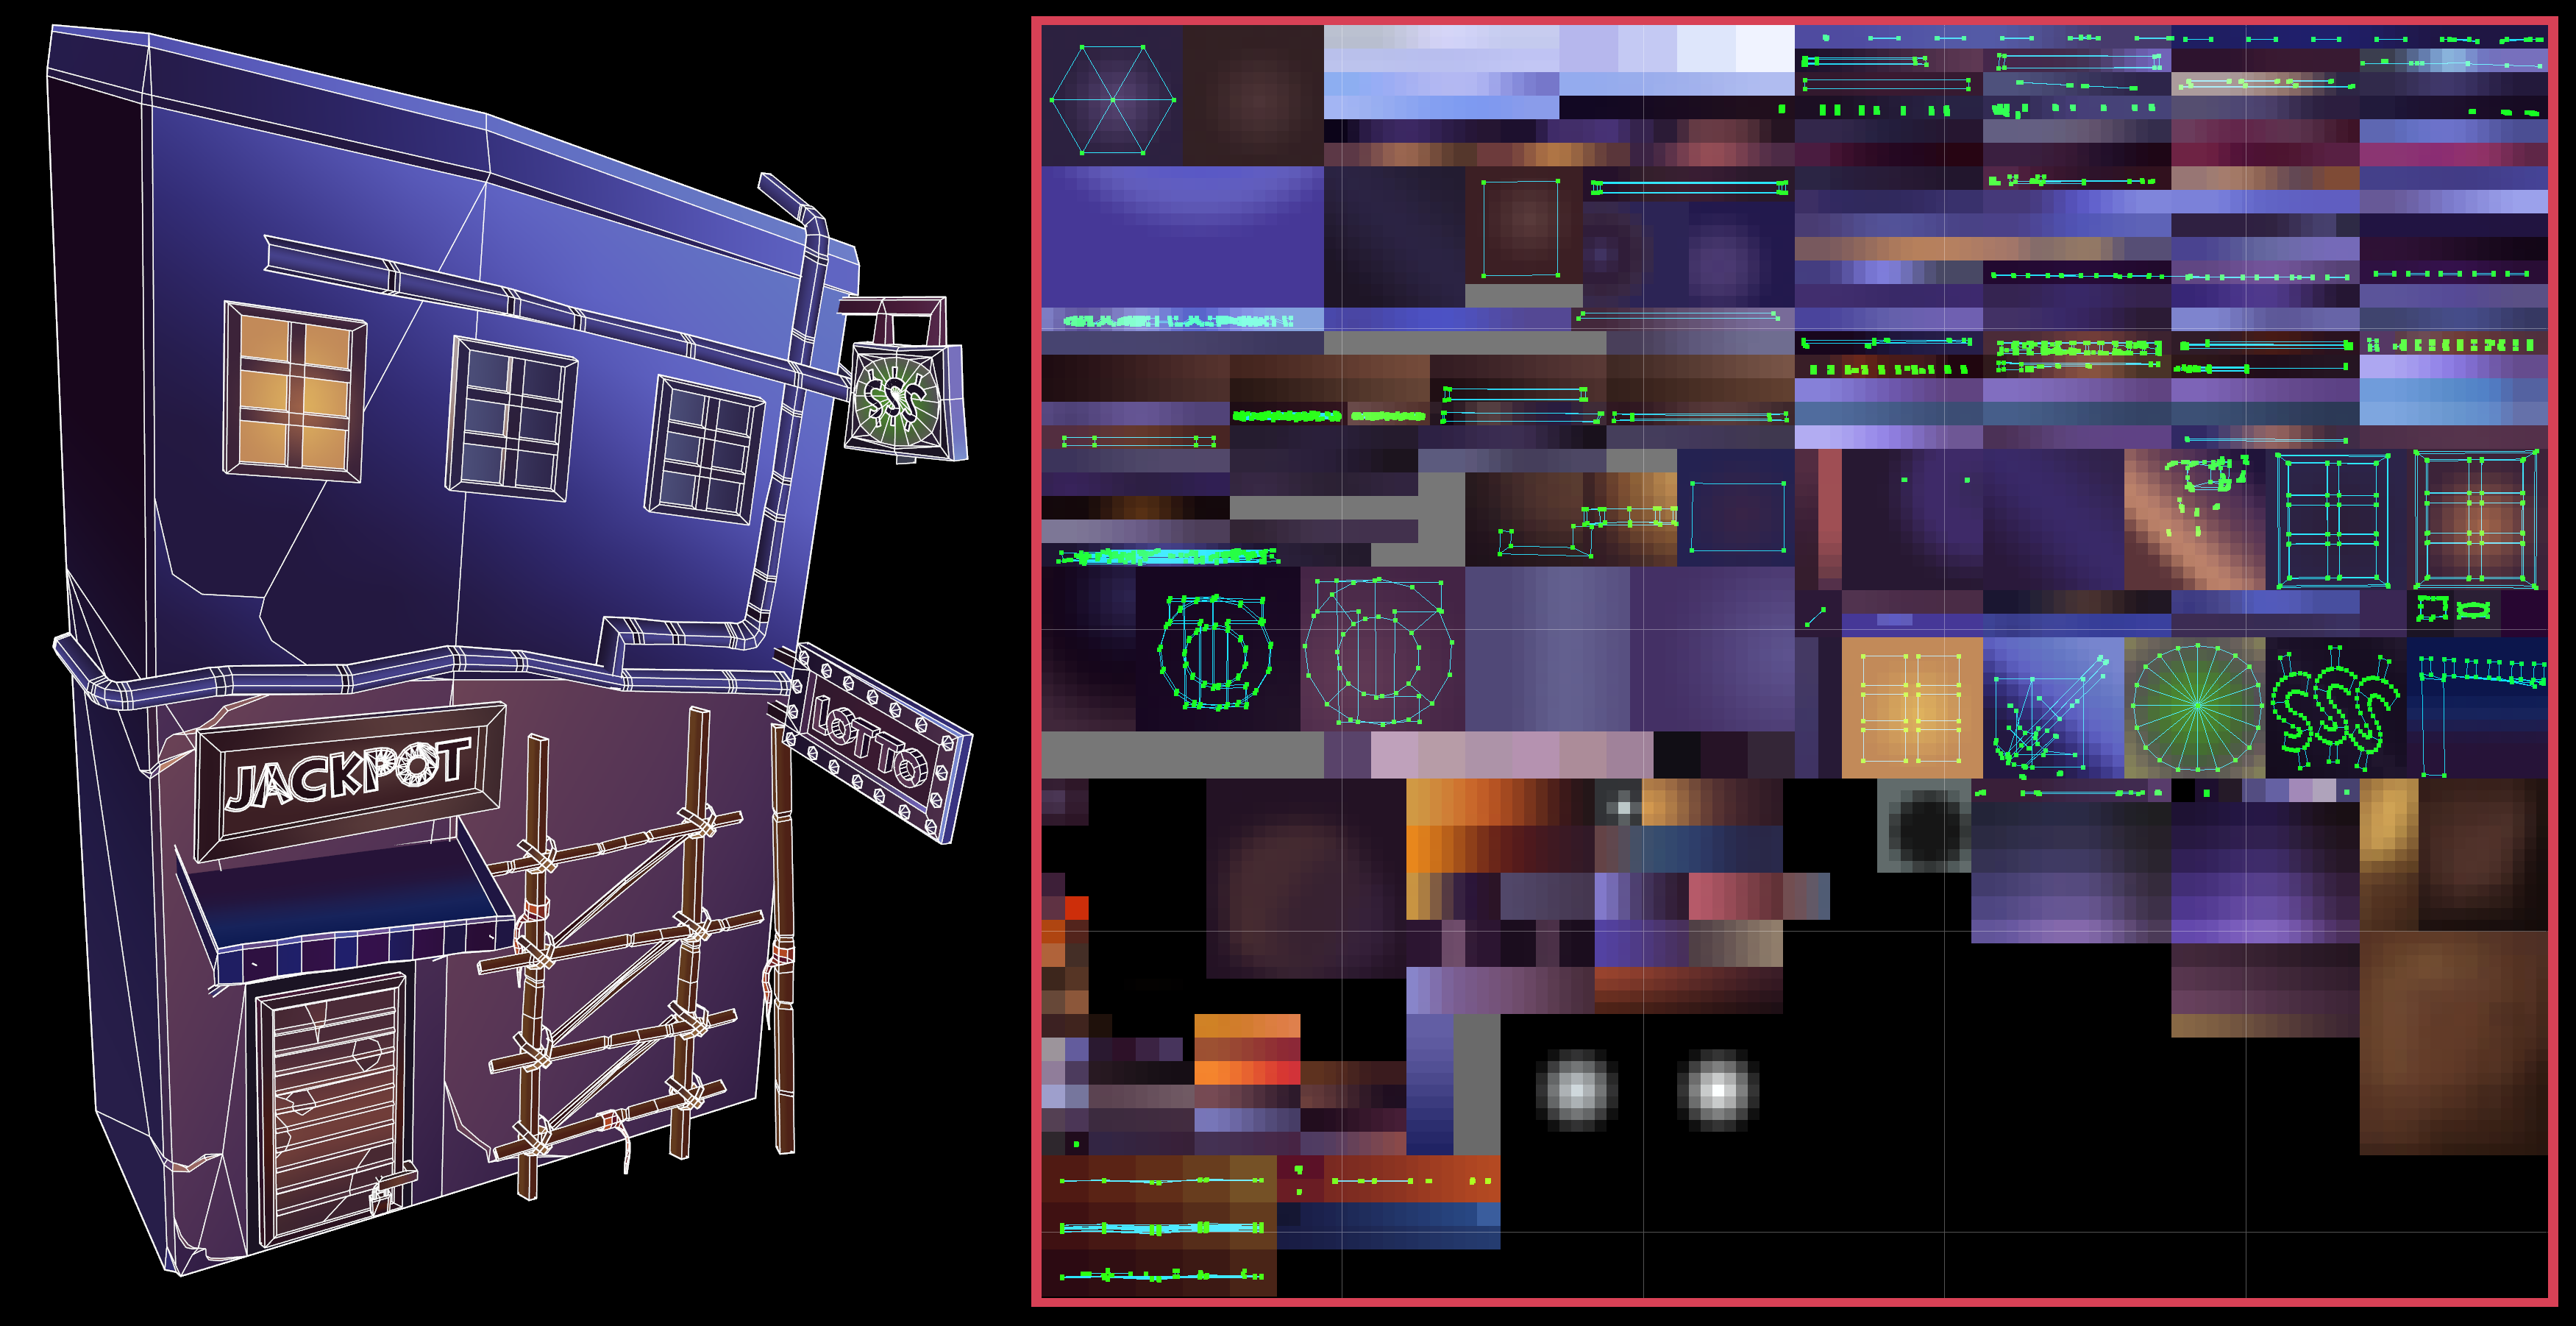
Here are the UVs of one of the assets from this scene:
This technique commands the use of a lot more triangles than if we were to texture the environment using traditional texture maps. But I measured no drop in frame rates on our target devices and platforms, while at the same time saving huge chunks of memory which we could then allocate elsewhere.