
Sheng Xu
Works > Loopdeloop
Real-time Animations
Throughout January 2024 - March 2024, I created 3 animations, for consecutive Loopdeloop animation challenges. I set out with the purpose of creating something short and focused, utilising an amalgamation of all my skills under tight deadlines. I used a mix of Maya and Unity. The final render is a simple recording of the Unity Scene since the animations run in real-time.
The videos below are all rendered in HDRP, but I have since ported the scenes to URP and they run real-time on mobile too. If you ever see me in person, make sure to ask me to show you :)
Are we there yet?
Theme: “Boat”. (Created in 10 days)
Highball
Theme: “Ball”. (Created in 8 days)
Radetzky
Theme: “March”. (Created in 7 days)
Behind the Scenes Breakdown
Below, I showcase a few techniques I used to create the above animations.
1. Flipbook Animation System using Sprites and Geometry
Detailed breakdown of this technique separately detailed HERE.
In short, this technique is broken into 2 parts that work together — the sprites and geometry. The rig is set up in Maya using my custom toolset, and animators can then add/update new sprites/meshes to the character as they are animating.
The animation data for this system is encoded to special bones in the rig, so no special export procedures are needed.
In Unity, the bone animation data is read and the system runs with no problems at editor-time/real-time.
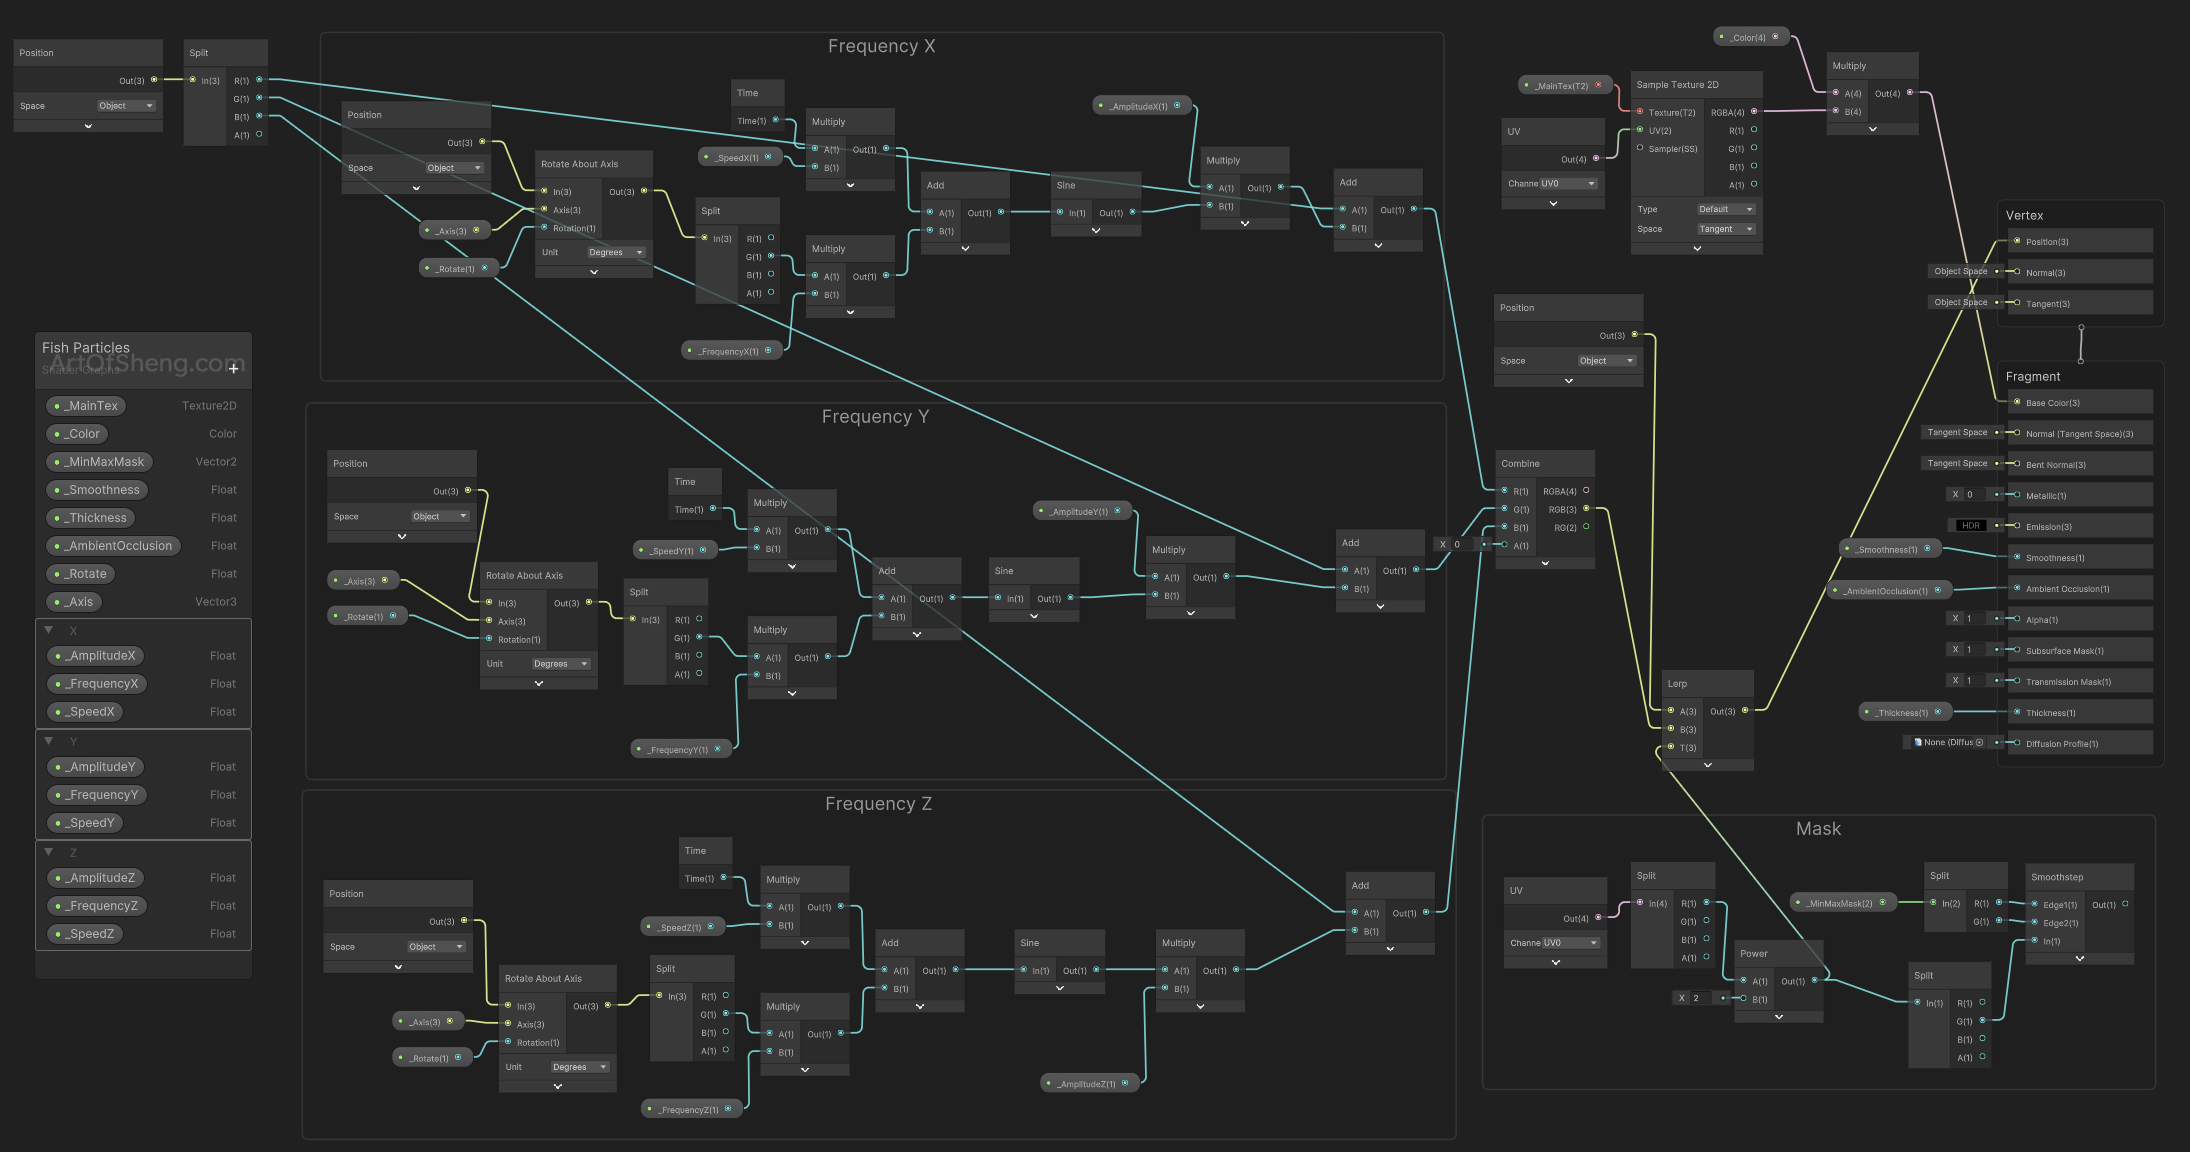
2. Vertex animated fish/seaweed
Fish and seaweed geometry are animated with a vertex shader created in Shader Graph. The ocean is then populated with fish using particle systems.
3. Shader-based traffic light system
After seeing traffic/pedestrian lights in Japan, I thought it would be an interesting exercise to encode the whole sequence into a texture and run it using a shader.
The concept is fairly simple:
- The UVs of the illuminated parts of the relevant traffic light models are scaled to nothing.
- All illuminated parts are assigned one material. This will use our special shader.
- The UVs of each individual light that needs to be animated separately should be given a unique Y value in the UV Map. These will match up with horizontal rows in the texture.
- A special texture is created to encode the traffic light sequence. The one used in my animation looks like this:

This is how the encoding works (stretched for clarity):
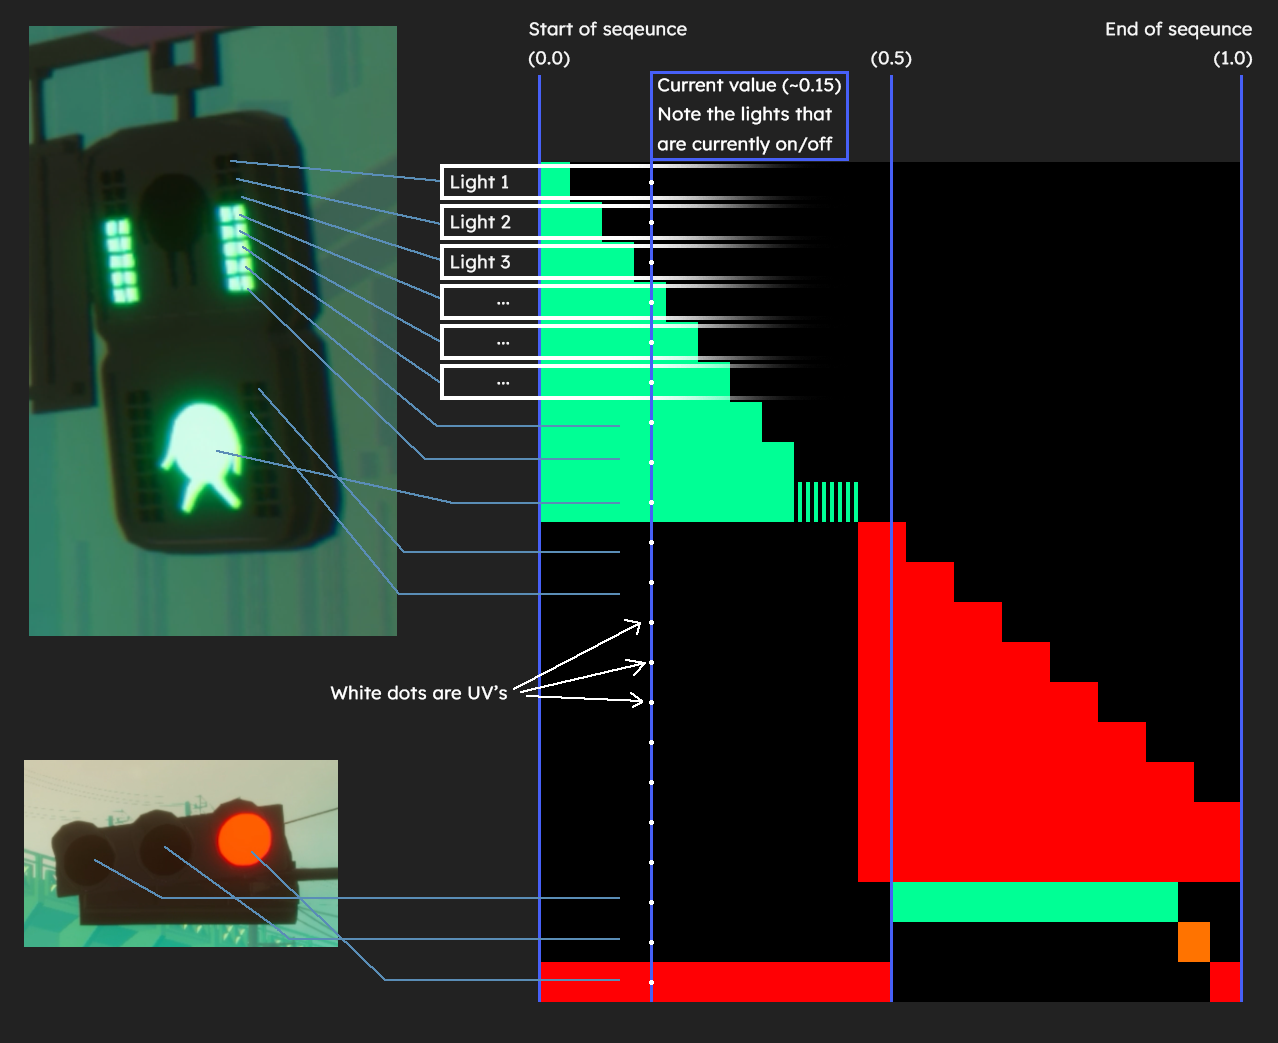
- Each horizontal row of pixels (Light 1, Light 2, Light 3, …) is a unique light in the sequence.
- As the shader transforms the UVs along the X-axis of the texture map, the corresponding parts of the geometry will update according to their respective UVs position in the texture.
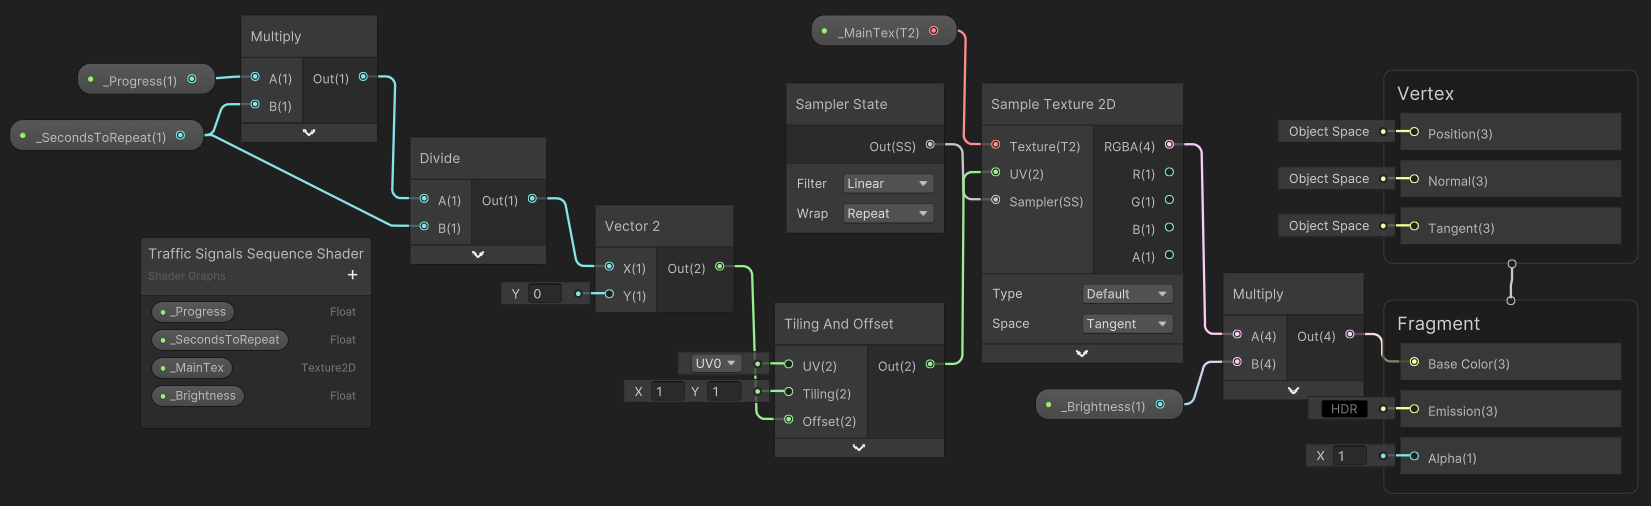
- The shader itself is very simple. It was put together quickly using Shader Graph. All it does is transform the UVs along the X-axis, with the
_Progressvalue normalized based on the_SecondsToRepeat, which should be set to how long it takes for the traffic lights to complete one cycle. The graph:
4. Volume Preserving Ball Rig
Rigging a ball? Seems like a rigging-101 class exercise, right? Well there were some challenges I had to solve:
- No use of deformers. Rig had to be fully bone-based.
- Had to support hitting some very cartoony non-spherical poses.
The rig is made of 3 bones. All can be freely scaled. The rest of the magic is just in very precise skinning.
Here are some of the poses I could hit with this rig:
And one of my favourite sequences
With wireframes overlayed: